Tokyo in 4 Days for Photographers - Golden-hour skyline from Tokyo Metropolitan Government Building
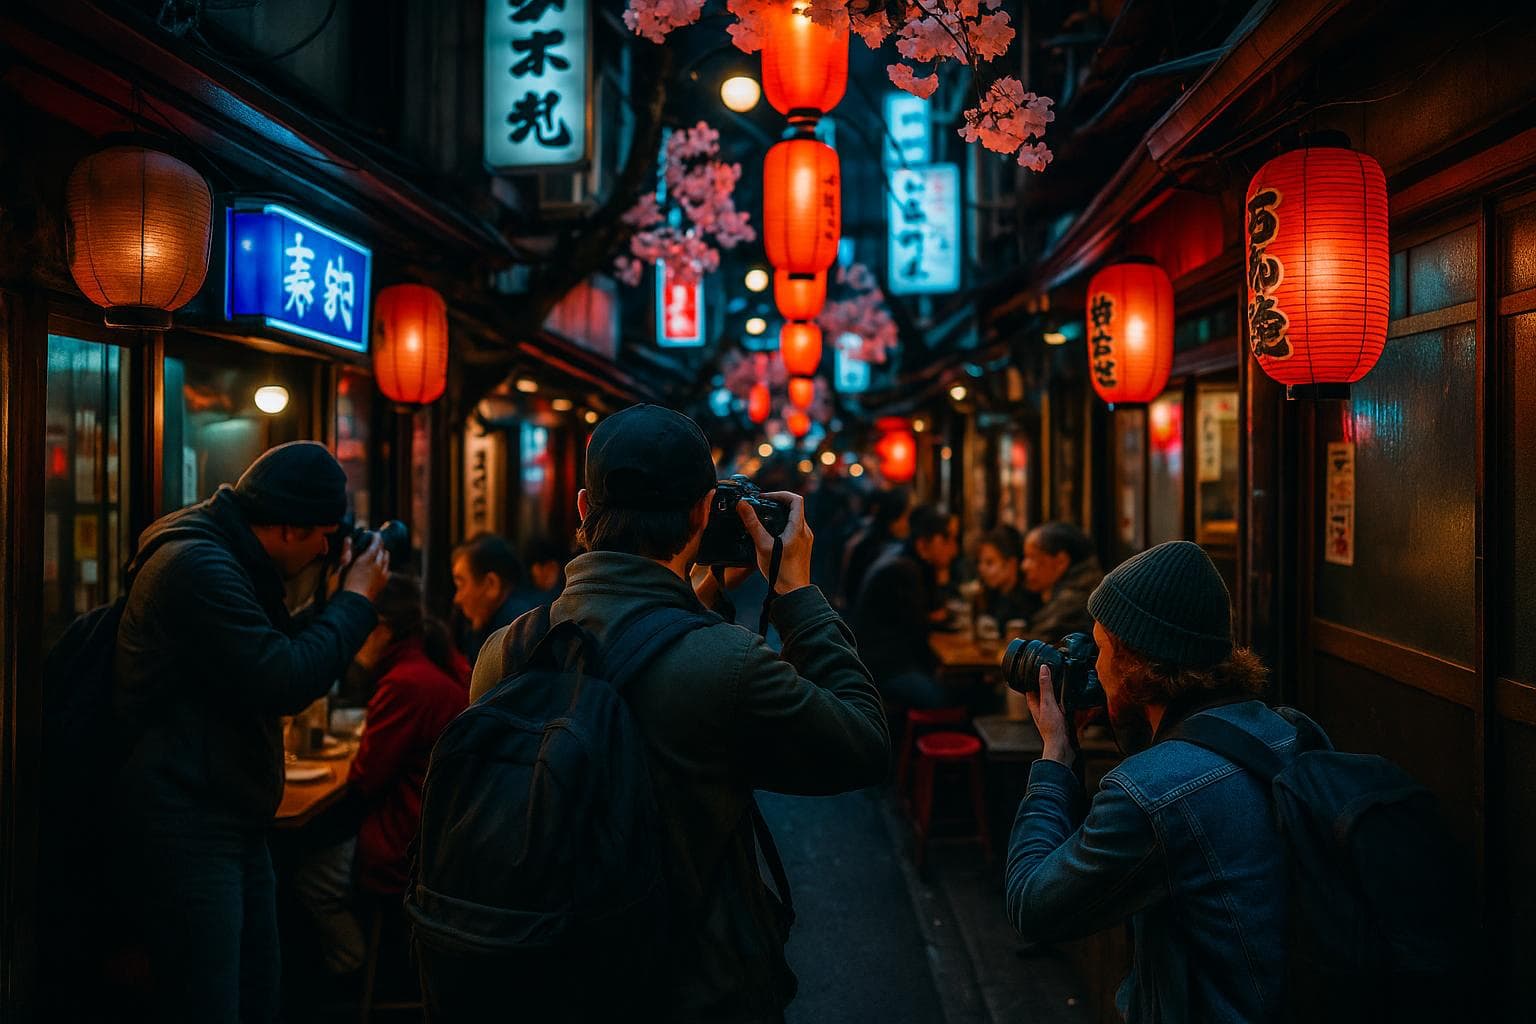
A moody, adventurous 4-day itinerary for photographers focused on neon alleys, intimate izakaya interiors, and elevated cityscapes across Shinjuku and Shibuya. Each day balances golden-hour viewpoints, late-night alley shoots, food stops in local yokocho, breaks and transfers — with insider tips for getting great frames while minimizing crowds and permit headaches.
Highlights
- Golden-hour skyline from Tokyo Metropolitan Government Building
- Intimate izakaya lanes: Omoide Yokocho, Nonbei Yokocho, Ebisu Yokocho
- Golden Gai's neon alley portraits
- Shibuya Sky and the scramble crossing at night
- Backstreet neon of Kabukicho and Dogenzaka
Itinerary
Day 1
Shinjuku: golden-hour skyline, dinner in Omoide Yokocho, then neon alley portraits in Golden Gai and Kabukicho.
Golden-hour skyline: Tokyo Metropolitan Government Building Observatory
Catch wide panoramas of Shinjuku’s towers as the city shifts into neon. Free observatory with large glass viewing platforms — ideal for sweeping dusk panoramas and tripod-free long exposures.
Tips from local experts:
- Arrive 45–60 minutes before sunset and nab a spot near the west-facing windows for the best golden-hour light; the observatory is free but can get busy on clear evenings.
- Tripods are usually allowed but ask security: if denied, use a beanbag or shoulder brace for steady long exposures; bring an ND/filter for silky car trails below.
- For variety, shoot both wide (16–35mm) for cityscapes and telephoto (70–200mm) to compress tower clusters — swap lenses quickly to capture changing light.
Transfer: observatory to Omoide Yokocho (walk/short taxi)
Short transfer to the compact izakaya lane near Shinjuku Station — use this time to change lenses/batteries and confirm dinner options.
Tips from local experts:
- Leave camera bags zipped and lens caps on during the walk; entrances in the area are narrow and crowded after dark.
- If carrying a tripod, fold it and use a shoulder strap to move quickly through pedestrian traffic.
- Check Google Maps quickly for the exact alley entrance; small side streets can be easily missed after dark.
Dinner & atmospheric interiors: Omoide Yokocho
Shoot tight portraits, food close-ups, and low-light interiors in this historic cluster of tiny izakayas — pick a seat near the alley for street views.
Tips from local experts:
- Tell hosts you’re a photographer before shooting interiors — many small izakayas appreciate the heads-up and may move a light or allow a quick frame.
- Bring a fast prime (35mm or 50mm f/1.4–f/1.8) for available-light food and portrait shots; ISO 1600–6400 is normal here.
- Respect diners’ privacy: aim for candid, atmospheric shots and ask permission if focusing on a single patron. Smaller forks & stools often block tripod setup — rely on high-ISO handheld.
Golden Gai alley portraits and neon details
Narrow lanes lined with tiny themed bars: ideal for moody portraits, signage close-ups, and shallow-depth details once the neon kicks in.
Tips from local experts:
- Golden Gai is very narrow — avoid large tripods; use a monopod or high-ISO handheld and look for one quiet doorway for staged portraits.
- The best composition comes from eye-level frames that include signage and patrons; ask bar owners if you can photograph a doorway — many will oblige for a small drink order.
- Golden Gai gets crowded late; shoot earlier in the evening for empty-lane moody frames, and return later to capture bar exteriors with patrons and bokeh.
Kabukicho neon crawl: pachinko fronts, hostess bars and street-level drama
Wide-angle and tele shots of animated neon facades, pachinko reflections, and crowds — great for motion blur and colorful backlit silhouettes.
Tips from local experts:
- Use a 24–70mm for flexibility: wide for street scenes, 70mm+ to isolate signs and reflections; try slow shutter (1/4–1s) for neon streaks with handheld stabilization.
- Be aware of busy sidewalks: shoot from building entrances or crosswalks for safer vantage points; avoid photographing security staff or private faces without permission.
- If you want uninterrupted neon facades, scout side alleys adjacent to the main drag for less crowded vistas and better compositions.
Day 2
Shibuya: rooftop golden hour at Shibuya Sky, the scramble crossing at dusk, then neon-filled backstreets and a small izakaya alley for dinner.
Rooftop golden hour: Shibuya Sky (Scramble Square)
Elevated observation deck for dramatic sunset-to-night transitions overlooking the Shibuya scramble and surrounding skyline — excellent for time-lapses and layered exposures.
Tips from local experts:
- Buy a timed-entry ticket in advance for golden-hour slots to guarantee access; Shibuya Sky can sell out on clear evenings.
- Bring a small tripod for bracketed exposures/time-lapses; recompose frequently to capture the changing light over the scramble below.
- For unique angles, use a 24–105mm to switch between wide platform shots and tighter skyline telephoto frames; watch for reflections on the glass — position close to the barrier.
Transfer: down to Hachiko and the crossing
Short descent and walk; use this time to format cards, swap batteries and prep for street-level long-exposure work.
Tips from local experts:
- Set camera to a high-ISO standby mode for quick handheld frames when crowds spike at the crossing.
- Keep one lens (35mm or 24–70mm) on the body for rapid reaction shots and another in the bag for planned long exposures.
- If using neutral density for creative blur, calibrate exposures at a nearby bench while you wait for the light to deepen.
Shibuya Crossing & Hachiko statue: layered street scenes
Classic scramble crossing frames from multiple vantage points — low-angle silhouettes, overhead blur, and Hachiko foreground portraits.
Tips from local experts:
- For overhead motion blur, use 1–2s exposures from a building entrance or pedestrian overpass; bring a small beanbag if tripods aren’t allowed.
- Use Hachiko as a foreground anchor for wide compositions; wait for moments when groups part to get a clear statue silhouette against the crossing.
- Avoid peak tourist hours by shooting late evening crowds or after 21:30 for more controlled compositions with neon dominance.
Dinner in Nonbei Yokocho (drunkard’s alley): tiny izakayas and portraits
A cluster of small bars perfect for atmospheric portraits, candid interiors and close-up food photography — much quieter than the main crossing.
Tips from local experts:
- Bring a fast lens (50mm or 35mm f/1.4) and ask staff permission for doorway or bar-top shots; a polite request goes far in small bars.
- Book or arrive early for a seat by the alley entrance to capture both interior and exterior neon portraits in one frame.
- Balance ambient neon with a small LED panel or reflector for subtle fill on faces inside cramped izakayas.
Center Gai & Dogenzaka neon walk: dynamic street portraits
Shoot neon signs, shopfront reflections, and candid portraits along the iconic pedestrian arteries — ideal for high-contrast, color-saturated images.
Tips from local experts:
- Scout a few fixed positions (street corners, stairwells, shop doorways) early, then return for decisive moments when neon and crowd movement align.
- Use split-toning in-camera or with gels to emphasize neon hues, and try silhouettes against large ad screens for moody contrast.
- If shooting people, use a 35mm for environmental portraits; for more intimate headshots, step back and compress with a 50–85mm.
Rooftop wind-down: MAGNET by Shibuya109 (MAG's Park)
Late-night rooftop vistas and quieter neon views above Center Gai — a good spot for reflecting on the night and final long exposures.
Tips from local experts:
- Check MAGNET’s rooftop hours in advance; rooftop openings can close earlier than the nightlife below.
- A small tripod and remote shutter will help with longer exposures here; watch wind gusts near the edge and weigh down the tripod.
- Capture reflections in puddles or glass railings for layered neon compositions; bring a microfiber cloth to clean spots on barriers for clear framing.
Day 3
Riverside golden hour at Nakameguro, then Ebisu izakaya crawl and Harajuku/Shibuya backstreets for evening neon portraits.
Meguro River riverside (Nakameguro) at golden hour
Soft, directional light on water and bridges — perfect for reflective compositions and quieter pre-night frames before heading toward Ebisu.
Tips from local experts:
- Golden hour by the river gives soft highlights on water — a polarizer and 24–70mm will help control reflections and frame bridges.
- If you want empty riverbanks, arrive at least 30 minutes before golden hour; the path narrows and walkers arrive quickly.
- Street lamps turn on early; shoot the transition with bracketed exposures to retain detail in both water and shadowed alleys.
Transfer: Nakameguro to Ebisu (short train/walk)
Quick transfer — use it to backup shots, swap to a fast prime for low-light izakaya work and top off batteries.
Tips from local experts:
- Pack gear into a sling bag or backpack with quick-access pockets to swap lenses on the move without stopping in crowded stations.
- Top off batteries at a convenience store if needed; many have charging stations and spare SD cards on sale.
- Note train exit names for Ebisu East/West — exiting the correct gate saves 5–10 minutes when moving toward Ebisu Yokocho.
Ebisu Yokocho izakaya crawl: local favorites and neon interiors
A lively cluster of small eateries with varied lighting and textures — great for storytelling shots and moody food portraits.
Tips from local experts:
- Rotate between establishments for varied color temperature: some bars use warm tungsten, others cool LEDs — use white-balance creatively.
- Ask staff about their signature dish and photograph the cook prepping at the counter for behind-the-scenes character shots.
- If you want isolated portraits, request a quieter corner and photograph with a 50mm at wide aperture for creamy bokeh.
Harajuku (Takeshita Street) after dusk: colorful textures and fashion silhouettes
An unconventional late-evening stop: quieter than daytime but still full of neon shopfronts and tactile details — good for stylized portraits and editorial frames.
Tips from local experts:
- Takeshita Street calms after dark — shoot storefronts, mannequins, and neon signs without the daytime crowds; a 35mm prime works great here.
- Use window reflections to layer subjects and neon in a single frame; a small reflector helps shape light on a model’s face if you have assistance.
- Respect shop hours — some stores close early; scope out a few promising facades first and return for longer exposures after closing.
Dogenzaka backstreets & neon alleys (Shibuya)
Hunt for dramatic signage, rain-slick reflections and moody alleyway frames that feel cinematic — perfect for late-night storytelling shoots.
Tips from local experts:
- When wet, Dogenzaka’s pavement produces rich neon reflections — consider bringing a small spray bottle to subtly wet a foreground for controlled reflections (ask permission first).
- Use a 50–85mm to isolate signage and faces against blurred neon backgrounds; try single-point AF for portraits in low light.
- Scout safe pullouts (shop doorways, railings) to compose longer exposures without blocking pedestrian flow; always yield to local foot traffic.
Day 4
Flexible wrap-up: coffee and gear prep, a Shinjuku viewpoint, Hanazono Shrine’s nocturnal calm, then one final izakaya crawl to close the series.
Gear check & mellow cafe shoot: Streamer Coffee Company (Shibuya)
Coffee, charging, lens checks and relaxed environmental portraits in a specialty coffee space popular with locals — a calm start before an evening push.
Tips from local experts:
- Use this break to format and backup cards; many staff are used to photographers and won’t mind quick cafe interior shots if asked.
- Scout window seats for soft side light portraits; a 35mm gives contextual cafe scenes while a 50mm isolates details like latte art.
- Charge batteries inside and set up a tether or quick Lightroom preview on a tablet to review night shots from previous days.
Transfer: Shibuya to Shinjuku (train)
Return to Shinjuku for final night shoots — use the ride to plan exact alley recon and check opening hours of bars you want to revisit.
Tips from local experts:
- Plan the fastest route (JR Yamanote vs. subway) depending on your luggage — JR is direct but can be crowded during commute hours.
- Use the transfer to label/stack shots by location so you can quickly edit and present selects at day’s end.
- Confirm any final reservations or bar entry rules via quick phone check while en route to avoid surprises late at night.
Early evening viewpoint: Shinjuku Southern Terrace
A lower-key terrace with layered views toward the south-facing streets and an intimate urban foreground — good for golden-edge light and preparatory frames before the night.
Tips from local experts:
- This terrace gives quieter vantage points than the main government observatory — use it for composed foreground elements and controlled exposures.
- Bring a mid-range zoom (24–70mm) to capture both portrait-friendly foregrounds and compressed tower groupings as the light cools.
- Look for reflective glass railings and planted beds to add natural foreground interest in compositions.
Hanazono Shrine at night: quiet shrine lighting and intimate frames
A calm cultural pause with lantern-lit gates and shrine textures — provides a contrast to the neon heavy frames and an opportunity for moody shrine portraits.
Tips from local experts:
- Shrine grounds are quiet at night; use a 35mm for environmental portraits including torii gates, and respect any restricted areas that may be cordoned off.
- Some shrines request no commercial photography after dark — for commercial/commercial-styled shoots contact shrine office in advance; for personal work remain unobtrusive.
- Low-angle frames with shrine lanterns make strong lead lines; a small LED or off-camera flash with diffuser can add subtle rim light without overpowering the ambient glow.
Final late-night izakaya crawl & neon revisit: Omoide Yokocho / Kabukicho
Wrap the trip with a flexible crawl through the alleys you loved most — re-capture favorite neon frames, test alternate compositions, and get final portrait studies.
Tips from local experts:
- Use this final session to try creative experiments (slow sync flash, multiple exposures) now that you know local rhythms; revisit spots that were crowded earlier for cleaner frames.
- If you plan a portrait session in a bar, bring a small appreciation gift or buy a round of drinks — locals respond well to polite gestures.
- Keep valuables secure and pack extra SD cards; late nights are busy and having backup storage lets you shoot without compromise.
Itinerary Attributes
| Days | 4 |
| Highlights | 5 |
| Season | Autumn |
| Month | November |
| Persona | Photographers |
| Transfers | 4 |
| Restaurants | 3 |
| Total Activities | 17 |
| Total Places | 17 |
| Activities Types | Attraction, Transfer, Meal, Neighborhood, Nightlife, Outdoor, Break, Culture |
